This will be a post foremost about Octopus Deploy. I appreciate not everyone uses this, so what follows will be of limited appeal to people who don’t. It will also make use of Privileged Containers for Docker-In-Docker, so if that’s a non-starter then it’s also probably not for you! But, I found a great trick that is too good not to share.
Octopus Deploy Workers and Containers
One of the relatively new features in Octopus that I think is a complete gamechanger is the ability to run steps on a worker from a docker container image. This simple addition means you can have a container decked out with all the tools and dependencies you need to do a terraform/ansible/npm/etc deployment and no longer have to worry about the worker agent having the software available or installed. This is fantastic. That feature turns a single worker from a managed resource itself into something that can handle an almost unlimited set of scenarios.
The only real issue is that while workers now run containers and will run multiple tasks at once, they can start to block each other and so one worker that everyone shares probably doesn’t cut it, except for small environments. But, if we could have dynamic workers that would start and stop when required, much like Octopus Cloud Dynamic Worker Pools, things would be much nicer. Sadly, I don’t think we can have that in a self-hosted Octopus Server. But, there is a blog post on running workers on a Kubernetes Cluster that is pretty close. That is a great way to get towards that kind of behavior. But, as always there is a downside, and in case it is that K8S clusters tend to be;
- Expensive to run, especially if they aren’t doing something 24/7
- Outside of the host network where the Octopus Deploy Server VM is (i’m sure you could do VNET peers and things, but it’s not trivial)
- Can be a real pain to configure and permission
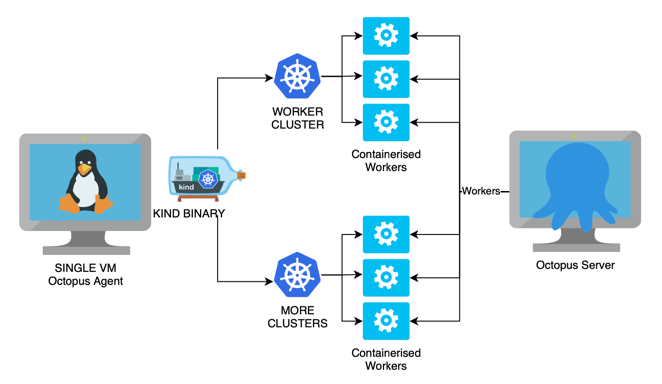
In my particular use case I would much prefer to host the Octopus Server as a VM and then host the workers in a K8S cluster that is as local as possible. So, finally i’ll get to the point, this post will show how to use KIND (Kubernetes in Docker) to host multiple clusters on a single Linux host and create workers inside them.
We will end up with something like this.
Setting Up the Required System
So, the pre-reqs are
- A Octopus Deploy Server running on a local VM
- A Linux VM with Docker and KIND Installed
- That Linux VM Registered in Octopus as a Worker
Some of the steps below will be a bit rough and hard coded, I leave it to the reader to make it work for their environment, this is just a blast through the basic setup.
Octopus Deploy Server
Have a server ready to go with Octopus Deploy installed. The community edition is plenty and it is simple to install
Linux VM
Ubuntu
We need a linux machine with Docker installed. I used Ubuntu 20.04 and chose Docker as an option during installation. I won’t explain this as it would take up time and be worse than the official instructions. Just make sure the Octopus Server and it can see each other on the network.
Octopus Tentacle
An Octopus Deploy worker needs the Octopus Tentacle software installed. Follow this and choose the default options for the tentacle
Then register it into Octopus as a WORKER
Infrastructure -> Workers -> Add Worker -> Linux -> Listening Tentacle
KIND
This is what let’s us run Kubernetes clusters on a single machine. KIND can run multiple clusters, but we will just create one for this scenario.
Install on the Worker
Install KIND like so on the worker
curl -Lo ./kind https://kind.sigs.k8s.io/dl/v0.11.1/kind-linux-amd64
sudo mv kind /usr/bin/kind
sudo chmod +x /usr/bin/kind
We also need Kubectl to talk to K8S clusters, so install it using snap
sudo snap install kubectl --classic
Creating Cluster
Create a file like this called workers.yaml and put in the IP of your linux VM (don’t use 192.168.1.70 like I have, yours will be different!). This ensures it is exposed on the whole network and not just local to the machine.
kind: Cluster
apiVersion: kind.x-k8s.io/v1alpha4
name: workers
networking:
  ipFamily: ipv4
  apiServerAddress: 192.168.1.70
  apiServerPort: 45001
Then we can use this config file to create a local K8S KIND cluster like so
sudo kind create cluster --config=workers.yaml
It should say the cluster has been created. We need to create an admin user and get a token now. So, to avoid repeating another post, follow the steps in the section called ‘Creating an Admin User’
https://www.rootisgod.com/2021/Cheap-and-Accessible-Kubernetes-Clusters-with-KIND/)
With the users setup and a token, we can now add it to Octopus Deploy as a Kubernetes Cluster.
Octopus Deploy Infrastructure
Add Our KIND K8S ‘Workers’ Cluster to Octopus
Token Account
Create an Account in the Infrastructure section with our Token for the KIND cluster we just created in it. We will reference this later
Infrastructure -> Accounts -> Add Account -> Token
Add Cluster as a Resource
Then add our Kubernetes Cluster like so
Infrastructure -> Deployment Target -> Add Deployment Target -> Kubernetes Cluster -> Listening Tentacle
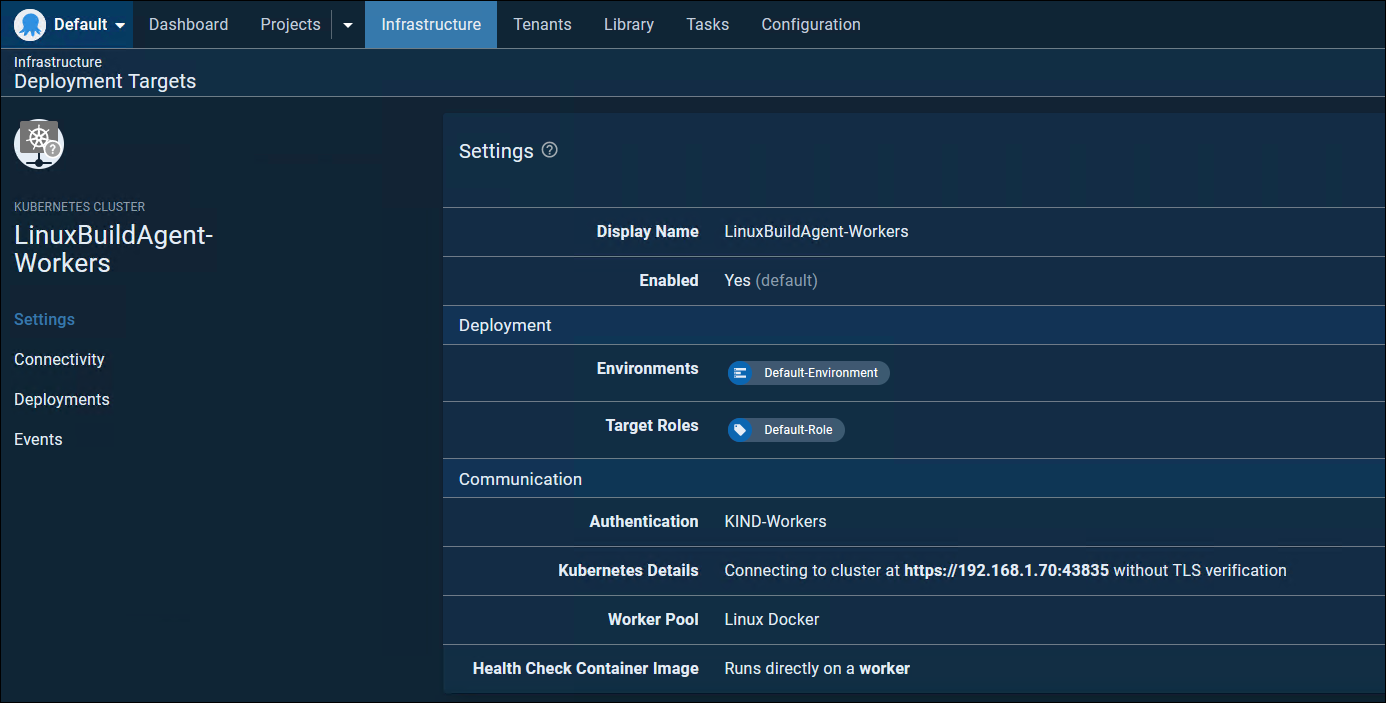
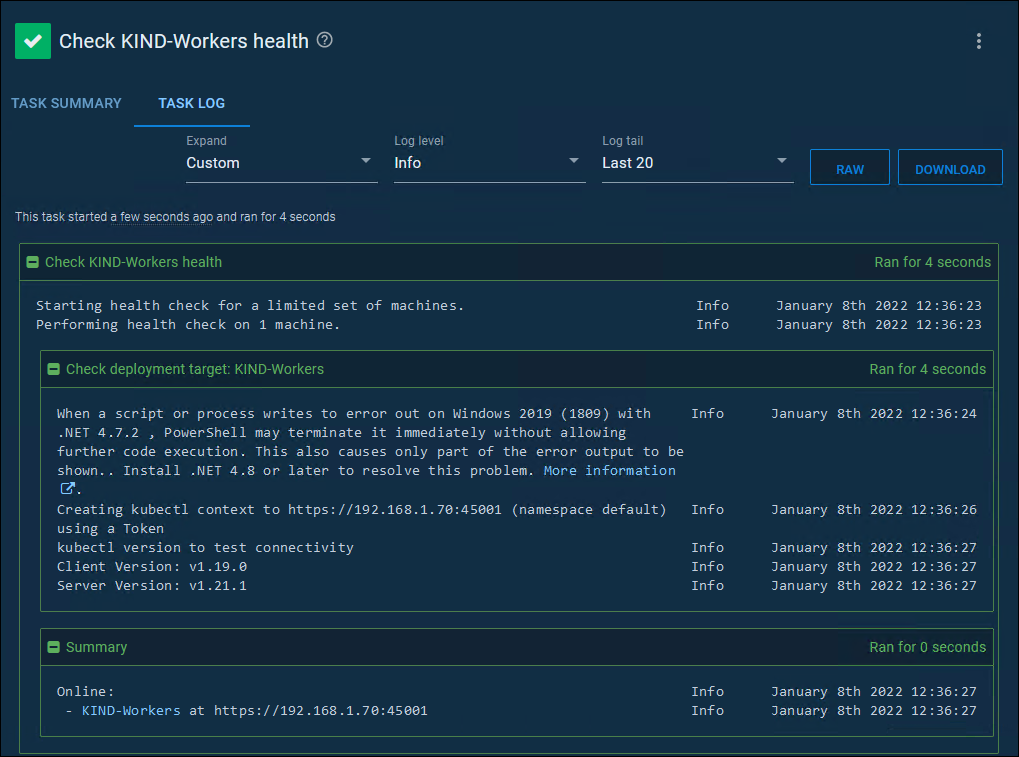
The health check should pass if all is well.
Add Polling Workers to the KIND K8S CLuster
It is now available to start taking deployments.
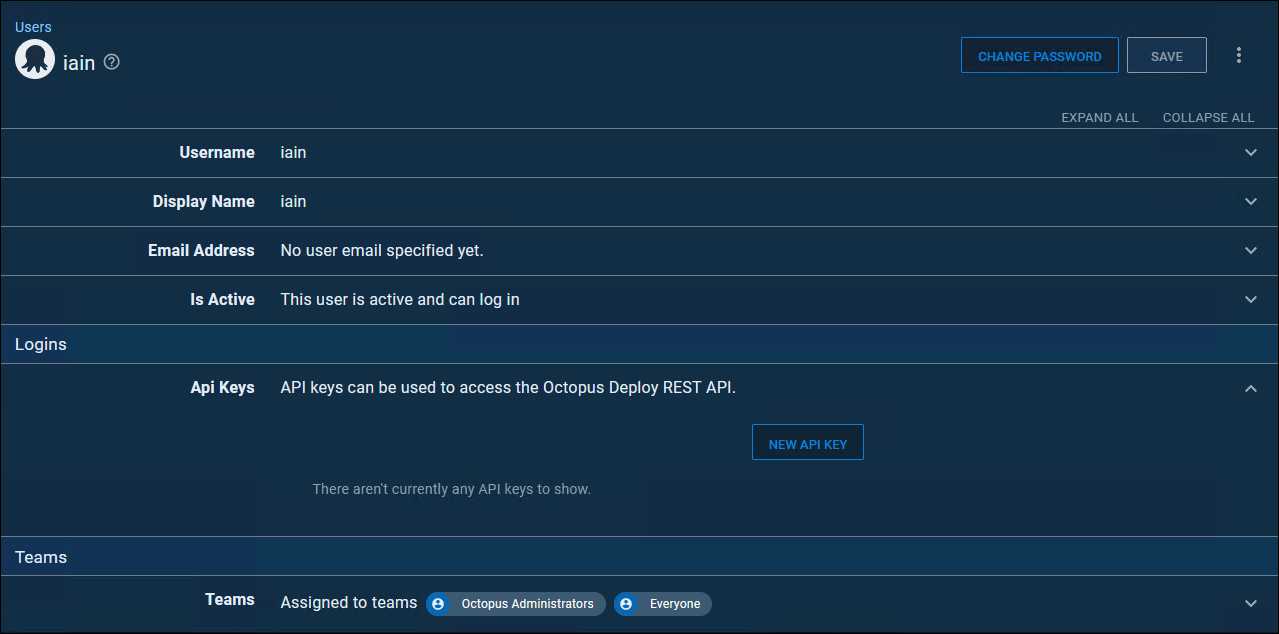
Create API Key
Be sure to have an API key ready though as it will need to be able to talk back to the Octopus Server in the next steps. Create one from your user account page.
Creating Worker Agents in the Cluster
Then follow these instructions exactly. This is the part which will create workers for us in this kubernetes cluster. And, these containers will have DIND (Docker-in-Docker) setup for us. It’s pretty simple but there are a LOT of options, ignore almost all of them. But be sure to choose ‘Privileged Mode’ though or Docker-In-Docker won’t work. That’s the only difference from the official instructions I had to make for this.
https://octopus.com/blog/kubernetes-workers

Once you have completed the steps and Runbook finishes, you should have some new workers running in the cluster, and now registered in Octopus!


Test Run a Container Deployment Step
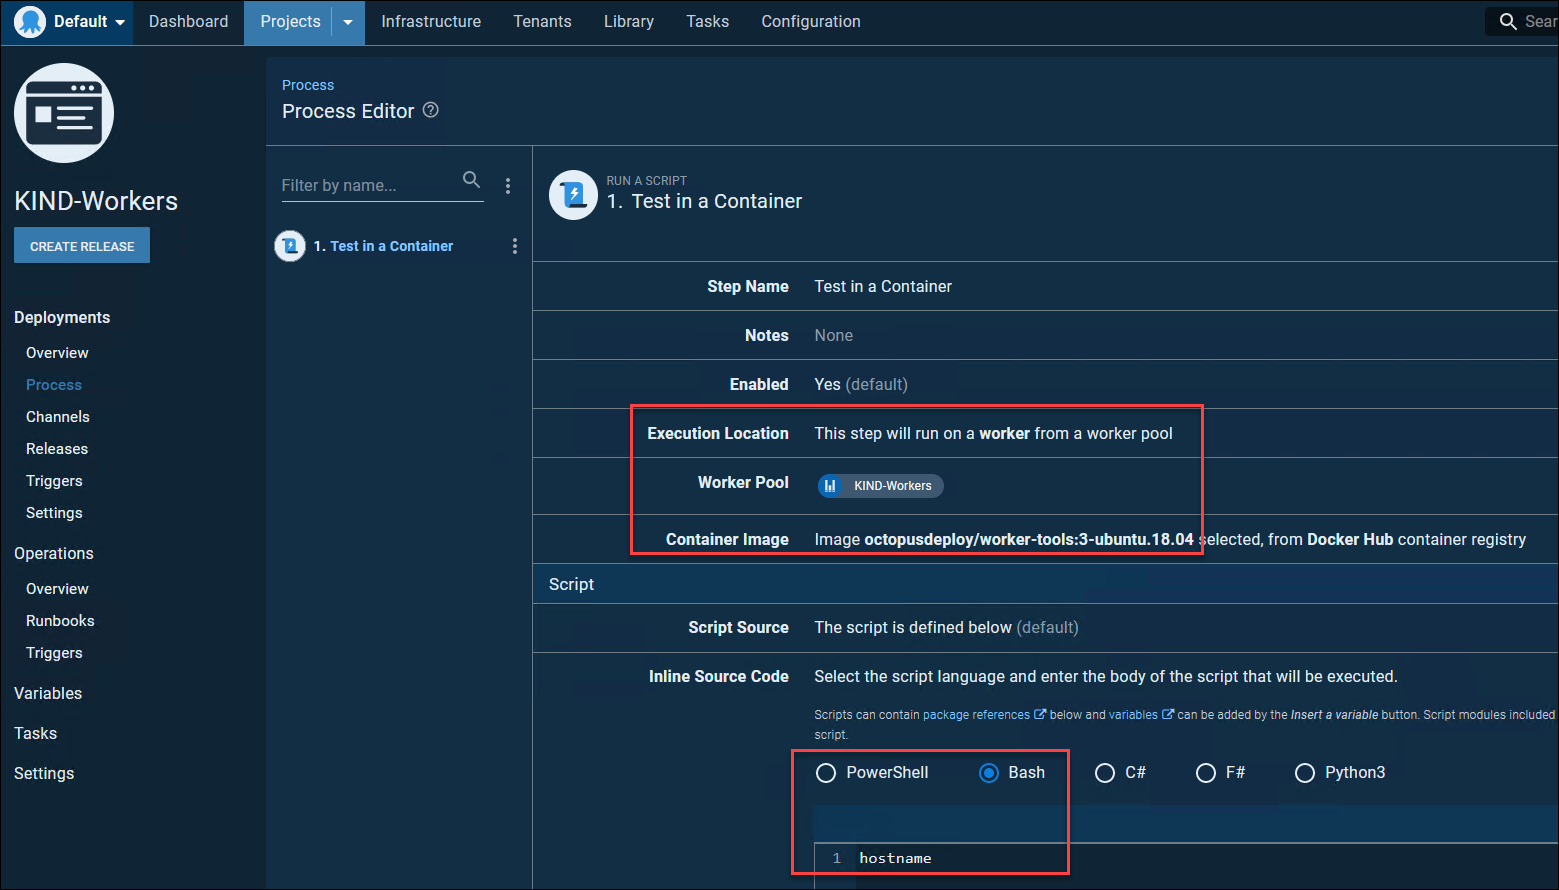
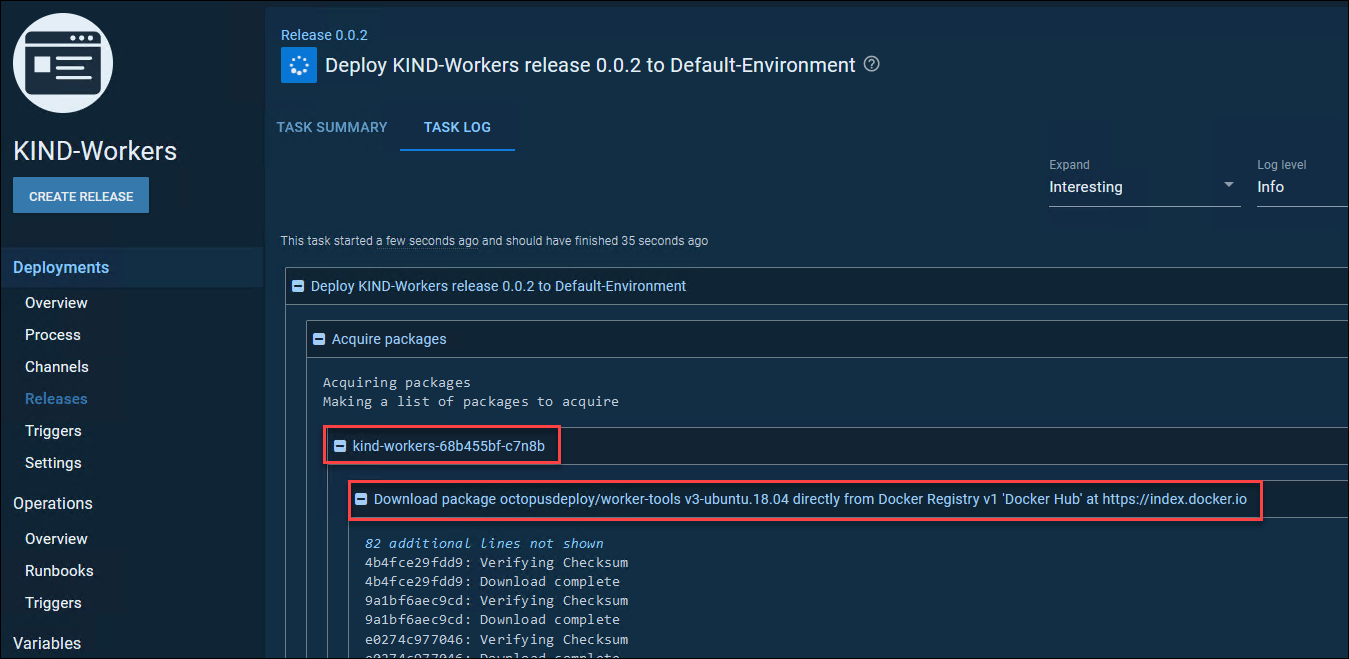
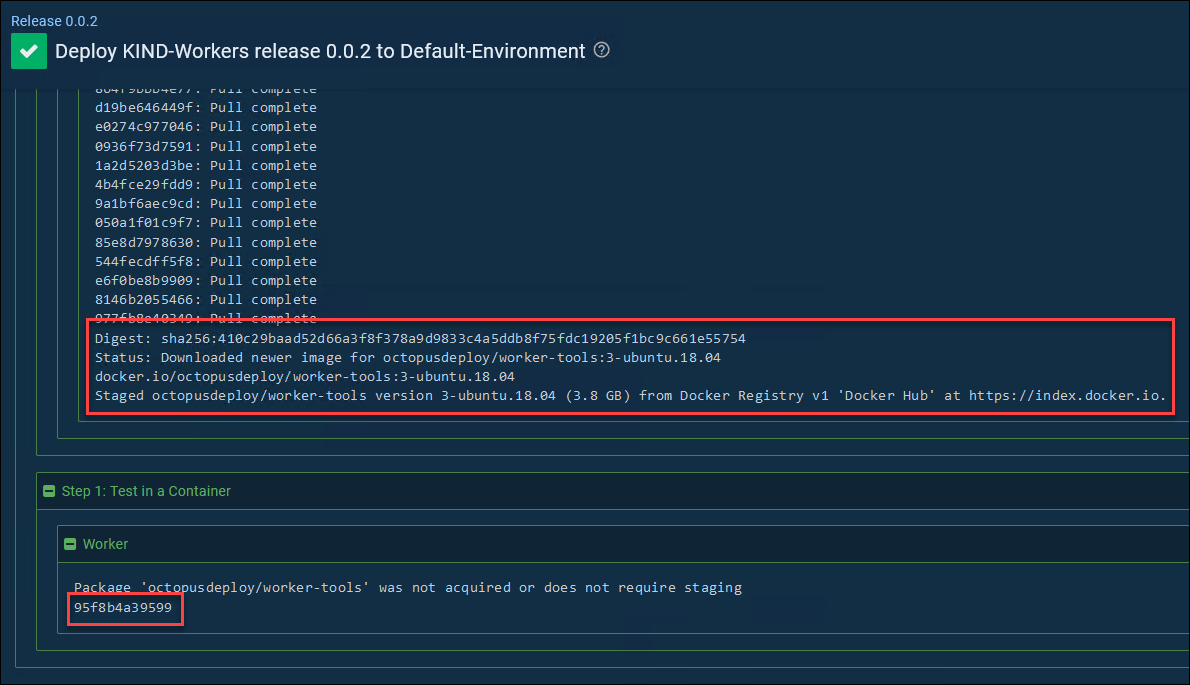
You can use these workers as normal workers, but the thing I really wanted them for was the ability to run other docker containers inside of these docker containers (which are running inside a kubernetes cluster running in docker!). So, let’s do a test deployment in a project using that worker pool and run the steps in a docker container. I will use the official Octopus Deploy worker image. Note that you can use any container you want though, I just used this to show a chunky ‘real-world’ image being pulled and used.
OMG!
OTHER NOTES
- It’s too much information for the general post, but I initially did this to also get around a ‘feature’ of Spaces in Octopus Deploy. Spaces allow a complete segregation of different projects. Each space is almost like a separate Octopus Deploy instance. This is great but it also means you cannot use a shared pool of workers. By creating a KIND cluster for each space and running the code to add the workers, you can very easily have workers in each space. All running from one agent. Mega.
- If you run Octopus Deploy on a Linux server you could potentially have everything described running from a single machine!
- Workers don’t count as ‘Targets’ in Octopus Deploy. So don’t be afraid to create lots of them if you have a smaller licence count - https://octopus.com/blog/workers-explained#if-a-worker-is-a-tentacle-does-it-count-as-a-target-for-licensing
